This month Mike was in overdrive trying to do as much as he could before he started teaching. He wired and insulated the master and spare bedroom. Next he sanded, stained and polyeurathaned the floors for the master and spare bedrooms. Finally, he preped the den for drywall and we installed the ceiling boards over labor day weekend.
Last Month
Monthly Menu Next Month Wired and insulated in the master bedroom.
We shared in this insulation project, I cut insulation to length and Mike hung them up.
Mike covered the ceiling downstairs with plastic to prevent dust, stain and poly from seeping through the floor boards.
The walls of the stairwell were also covered in plastic to keep the dust to a minimum in the rest of the house.
Here's a closeup of the plastic on the ceilings.
The sanding just started...
Fast forward about a day and here's what the floors look like.
Here's what it looked like about a day and a half into the sanding project.
After about 2.5 days of sanding with only short breaks for sleep, food and water.
Day 3, if this isn't good enough...well it's gonna have to be.
This was one exhausting project. I even helped out and ran the edger around the rooms twice.
Ah, finally the finished sanded floor!
Here's Mike putting a new tool to work, sanding between coats of poly.
Only four coats of poly on the floors upstairs...here's the spare bedroom.
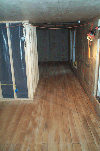
After spending nearly two weeks on the floor, the final product! Master bedroom
To prep for hanging drywall in the den, we cut some 2x4s and added some extra blocking every four feet.
Here's the load of 5/8" drywall that we loaded on to trailer at the hardware store and then managed to bring into the house all by ourselves...no thanks to Lowes!
Hanging drywall was tough since our ceiling doesn't meet the walls at a perfect 90 degree angle.
The first board went up pretty easily. Then we tried to put up the second one..again and again and again. We must have lifted that piece into place 5 times before it fit. We were both getting frustrated, Mike exploded, I cried and wished it wasn't a holiday so that we could rent a drywall lift. But after taking a 10 minute break, we managed to get the hang of it in a civilized mannner.
All of the middle boards went up pretty easily, we just measured, cut, lifted and screwed into place.
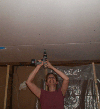
Here's me at work, my first time ever hanging drywall. FACT: one sheet of 5/8" drywall weighs 70 pounds!
Ah, the final board, probably only took us a total of 8 hours to hang spread out over two days, cuz I am a wimp!
Last Month
Monthly Menu Next Month
This site was last updated: December 1, 2007 3:09 PM

View My Guestbook
Sign My Guestbook


